I cleaned my scrapbook room a bit yesterday to unbury my Cricut machine and desk. My doTERRA business has taken over my room and my scrapbooking needs some love!
I made this ornament using an ornament shape, my Sure Cuts A Lot program and my Cricut. It is 9 inches tall. I cut out 4 of the ornament shape, then 4 of the round top shape and then 4 of the metal topper shape. I scored them all down the middle so it would be easier to fold and then I used adhesive squares to put it all together. I did put a line of wire down the middle before I adheared all four pieces. I used this wire to add a little bling on the bottom. Next time, I am going to glue the wire down the middle so it will not feel so loose. I added ribbon to the top and look how pretty!
I want to grunge the next one up just a bit, so if anyone has any ideas, please let me know!!
I love everything Tim! This announcement is pretty awesome, I LOVE the colors! I think the only outlet you can get this limited edition set is through Ranger Products but when I find out for sure, I will let you know!
Exciting news from Ranger and Tim Holtz just in time for Fall creativity! A limited edition collection of Distress Inks in harvest hues is now available. Like the changing of the seasons, this Autumn set is only available for a limited time, so collect them now before they’re gone.
Made from the unique Distress Ink dye formula, these fade-resistant, non-toxic and acid free ink pads will add a timeless nostalgic flair to your Halloween and Thanksgiving craft projects.
The Autumn Set is available in 3 rich harvest colors* for the season that’s pure Distress.
Seasonal Distress ink pads are conveniently packaged in a stacked set with a top label identifying all 3 rich colors. Each ink pad includes a QR code for smart phone users. This links to a video of Tim Holtz personally showcasing and demonstrating these special inks. Check in on the blog frequently for Distress Ink contest opportunities. Remember, the Seasonal Distress Inks will only be produced in a limited quantity, so order yours now before they are gone!
MSRP $17.99 ORDER LIM IT: 12 sets of Seasonal Distress Inks per retail store
*DUE TO THE LIMITED NATURE OF THIS PRODUCT ANNOUNCEMENT, THERE WILL BE NO RE-INKERS AVAILABLE. Shipping September 2011.
We held another Collaborative Painting event at Michaels and Josh lead this event again. It was fun to watch him paint and interact with the customers. He makes it look so easy!
Josh even had a 5 and 7 year old painting the water on this one! Here is the final piece, framed:
Here is what the first Collabrative Painting event produced. We decided to frame both pieces and display them in our classroom, they are just too beautiful not to show off!
I found this on Yahoo this morning and I thought this video was pretty neat. I have seen this done on paper but not in motion.
"It's a pretty impressive effect -- but it's not entirely new. The Checker Shadow illusion was published back in 1995 by MIT professor Edward H. Adelson, though optical illusion guru 'brusspup' really gives it new life by bringing it off the page and into the real world.
So how does it work, exactly? The key lies in the shadow cast by the cylinder and how our poor, confused brains process light. The shadow darkens the central square, but it still appears to be "light" in color because of the contrast with its darker neighbors. Our brains are so fooled by this local contrast that it's difficult to perceive that the "light" square in the shadow has the same absolute shade as the "dark" square out of it." ~ Yahoo
I made this page using a Digital Scrapbook software program called My Memories Suite. I have never used Digital Scrapbooking Software before so I thought I would give it a try. I have always used Paint Shop Pro, a graphics program. I decided to try this program and see if it would be easy to use because I am always getting asked what program is easy to use to make scrapbook pages. I was pleasantly surprised!
The program comes with basic scrapbooking supplies and you can download more at their website: My Memories Suite. You first select an album to create the pages in and then start building pages. You can save your album at anytime and you can export your pages as .jpg to share in your online communities.
I loved this program so much, I signed up to be an affiliate! Another suprise I didn't expect was the My Memories Suite owners gave me a $10 coupon code to share with you to get the program for $29.99 PLUS a $10 coupon to spend in the store! HOW AWESOME IS THAT?? To purchase this software, just go to My Memories Suite and put this code in the promotion box at checkout: STMMMS2703 .
Go take a look at their website and let me know what you think!
This was done at my Michael's store about 2 weeks ago. It is a Collaboration piece that involved many different people who stopped into our store and added a little bit. Josh, who is our framer and a local artist, hosted the event. He said it was so much fun to have everyone do a little bit and to see the entire piece come together. Even a 7 year old girl helped!
It is so beautiful and well put together... I think this is truly a work of art made from everyone!
I have been so busy with my new doTERRA Essential Oil blog, I have not been showing my crafting blog some love! If you have not seen my doTERRA blog yet, YOU REALLY NEED TO! CLICK HERE!! doTERRA Essential Oils have changed my life! I don't feel sick anymore, I stopped going to get my weekly allergy shot from my allergist in April AND I have learned a TON about my body and how to let it heal itself naturally. Please CONTACT me if you would like more information, doTERRA Essential Oils are the BEST oils in the world and safe to ingest. They are Certified Pure Theraputic Grade oils and you will LOVE how they smell!
OK. Now, back to crafting! I will be posting again soon, and I can't wait to show you what I have in store!
I participated in another swap at Cricut.com . It was fun and challenging. The categories where "Let the music move you", "Tropical Vacation" & "Journals & Tags".
The luggage tag was easy to make and it was fun. I used an SCAL file from svgcuts.com . Others in my group where making coconuts and palm trees and titles, so, hopefully, this will be a great addition to the group.
Sarah loves taking pictures with her DSILX and I love looking at all her photos! This photo I especially love! She is learning fast how to take good photos!
Digital Scrapbook info: Font: trashed, ST Zephyr, John Handy LET Ornamental Ding: Flower Ornaments
Kit: Tuscan Summer by Debbie Knorr Flower: From kit titled "Roses", sorry, there is no designer name in the kit! Leaves: Carrie Stephens, spontaneous delight kit.
These are a couple of the demos I created for the SABA Home & Patio Show last week. Unfortunately, I didn't get pictures of the wood LOVE centerpiece or the configuration tray I complete, they where my favorites! I was so nervous about doing the demo, I completely forgot to take photos! Who would have thought I would forget. Oh well, I will have to make more!
This demo was with Cricut Vinyl. I made this for our Michaels to use at future demos. This is an 18x24 frame with silver poster paper inside to make it look like a mirror. The actual project I demonstated involved the Destinations cart. I cut out the Paris Eifel Tower and used a 16x20 frame with scrapbook paper inside. Very cool but again, no photos.... aye!
This demo was of altered canvas. I loved making this! I used craft paint, stickers, a ballerina poster, scrapbook paper, bling and lots of toole!
I had a terrific time doing the demo but I learned my lesson with no photos!
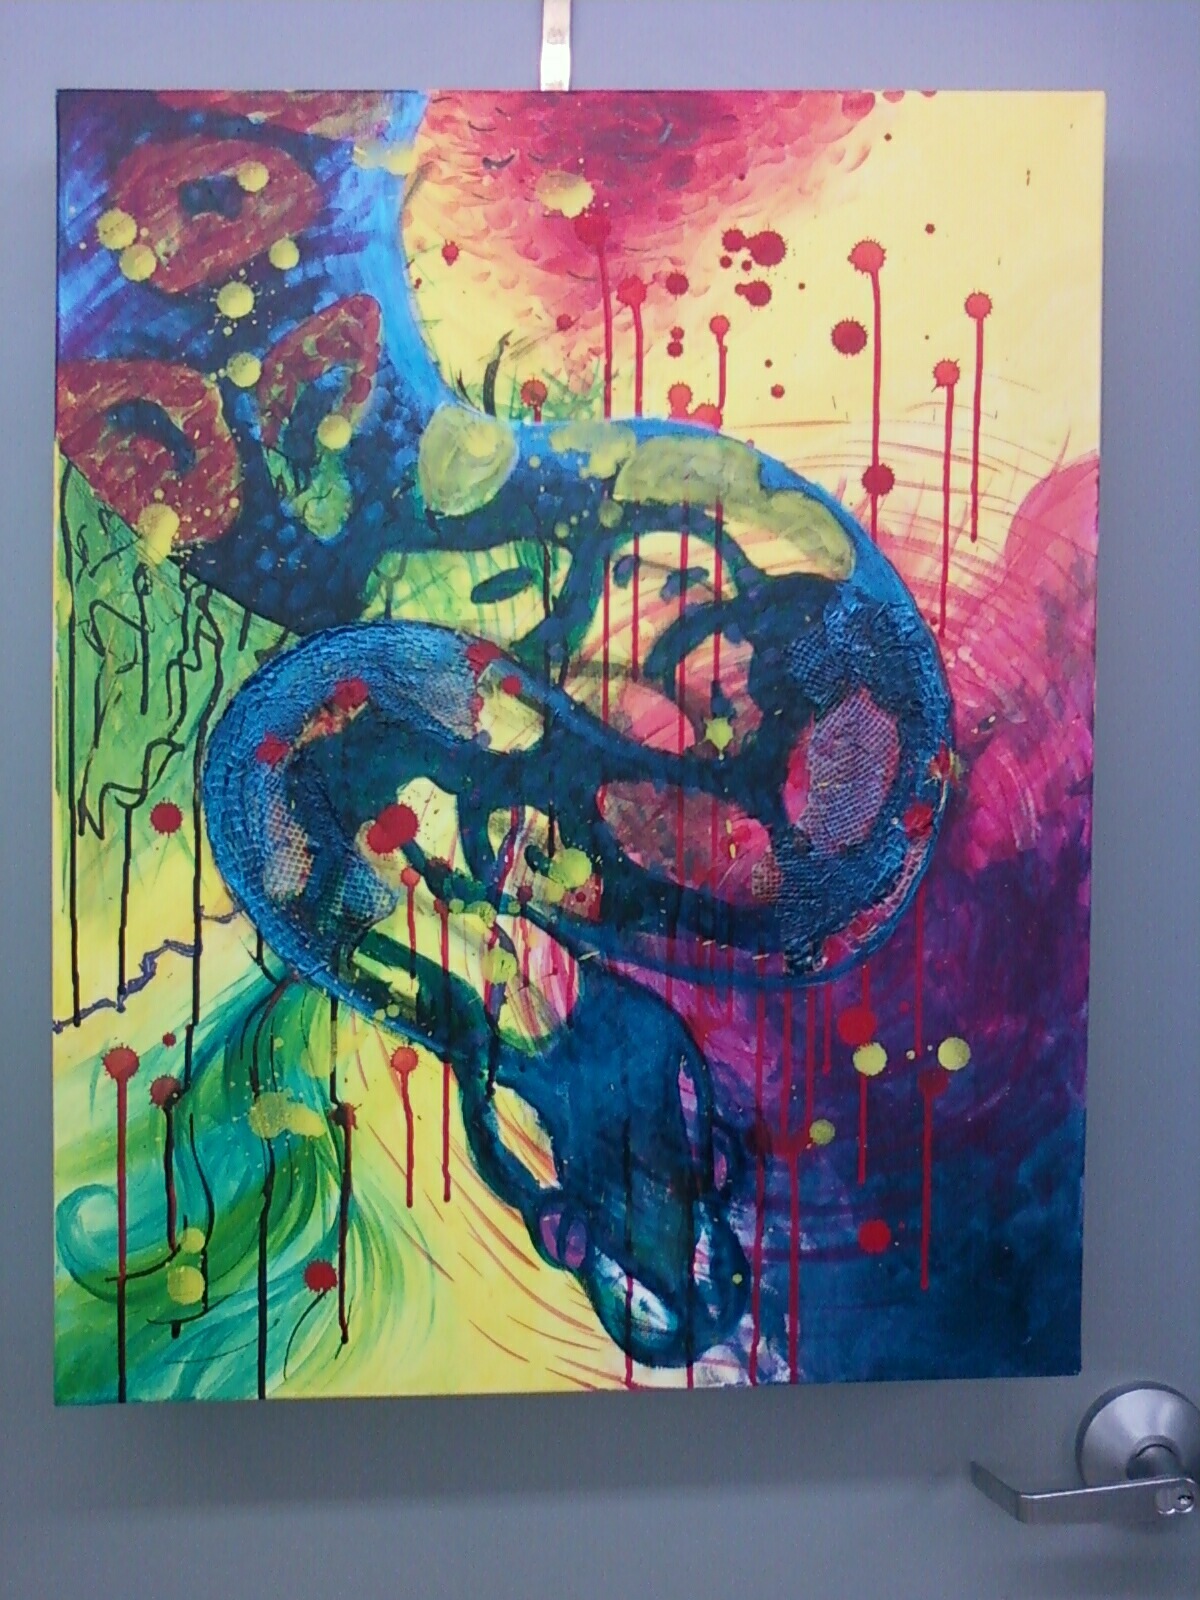
Susan, who works at my Michaels store, painted this snake on a huge canvas. She used real snake skin she Mod Podged on the canvas and then painted on top. It turned out so AWESOME!!! I love it Susan!
I made this out of 16x20 canvas, acrylic craft paint, scrapbook paper, photos from an internet search of grapes, a quote I found on the internet, chaulk ink, Mod Podge rhinestones, ribbon, artifical grapes and leaves.
I layered the ribbon with the sheer on the bottom and the solid on the front. The scrapbook paper in the background is 12x12. I put MOD PODGE on the back of it and glued it on. The grape bunch was sewn on the canvas with invisible stretch magic thread.
I tore the sides of the images and the quote and then inked the edges with brown chaulk ink. The piece on the bottom is a part that I tore off and I thought it looked good as part of the piece. These pieces were MOD PODGED on the backs to glue them on.
When the Mod Podge dried on the backs, I poured Mod Podge on the front, 2 layers, completly drying inbetween layers. This gave it a finished, glossy look.
I glued grape leaves and grape on the corners with hot glue. The ribbon is stapld to the back canvas stretch bars.
I put these piece in my kitchen since I love the Tuscan decor and I love wine and grapes. I ended up hanging it on my red wall, next to a piece the Floral Designer at my Michaels store created for me.
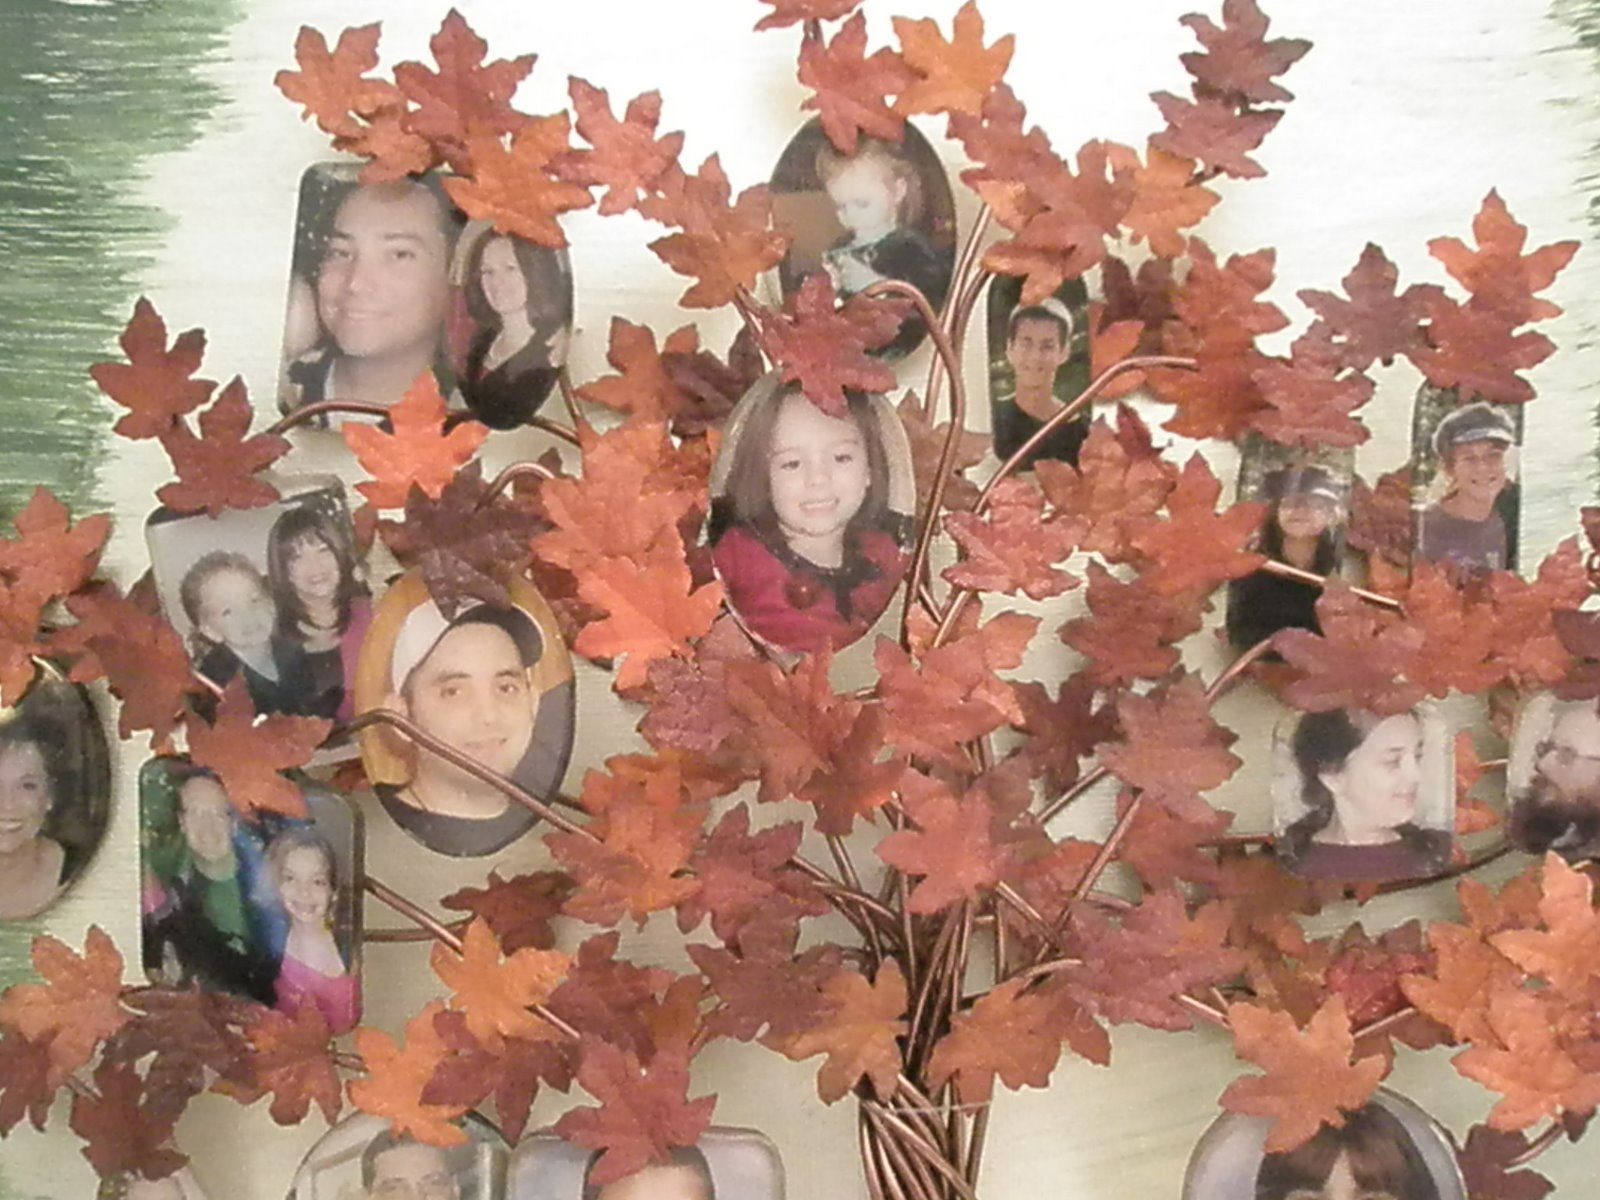
I made this family tree as part of the Compendium of Couriositis Challenge at Studio L3 but it took me too long to make to enter the challenge. I love how this turned out! I have plans to frame it and maybe add a title or phrase. I purchased most items at Michaels:
* Tim Holtz Fragments
* Tim Holtz Alcohol ink
(added to the green paint for more texture effects)
* Glossy Accents
* 16x20 canvas
* Chaulk Ink
* Acrylic Paint
* Wire
* Leaves (these were given to me, Michaels sold them a long time ago.)
* Stretch beading string, clear
* E6000 (to glue the leaves)
I painted the canvas edges green and the middle a champaigne metallic beige. I just kept playing with it until I liked the center shape, where the tree will go. When the green color was dry, I used Alcohol ink around the edges to give it a bit dirty look and to add a bit of darker green to it. I can't tell I used the Alcohol ink very much, but I did and it is the look I liked.
I printed the photos as wallet size through Snapfish.com . I put the Glossy Accents on the fragments and the placed on the photo. I let them dry overnight and then trimmed to fit.
I then cut about 10 pieces of wire a little bit shorter than the canvas. I twisted the wire in the middle to form the trunk and then formed the branches and the roots.
I sewed the tree onto the canvas with the clear, stretch beading thread to secure it. Then, I sewed the fragments onto the branches. I put my family on on side of the tree and my husbands on the other side. I glued the leaves onto the fragment to hide the thread and I glued leaves all around to fill the empty spaces. While gluing, I moved the branches into better positions so none of the faces was blocked.
I really like how this turned out! I am going to date it and add some more, I will update this post when I do but I wanted to share with you my little masterpiece. This was a lot of fun because I didn't use a pattern or template, I just thought about what I would like and took it from there. I am usually looking for inspiration around the web but this time I looked to my family and was inspired!
My husband and I went on a Hot Air Balloon Ride this last weekend. We have never been on one before, so this was a new adventure. I made the shadowbox above with a picutre the took of us in the basket, a picture of the balloon and the champaigne glasses we drank out of that are etched with information from the company.
It was hot! Now, I know why they say to dress light! There were 8 passengers and the pilot. I did video tape most of it, although my video taping skills have always been lacking, lol! Lots of ground shots and a few too many shots that make my tummy dizzy.
It was so calming to go up and it wasn't scarey! I hardly noticed when we went up to 2500 feet. The scenery was amazing and the mountains are so pretty. This was fun and I would definitely go up again!
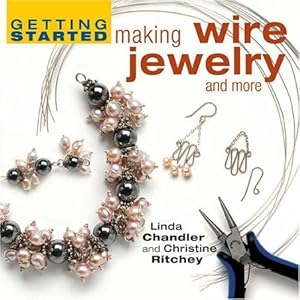
I bought this book about 4 years ago because I loved the bracelet on the front cover and I wanted to make it someday. Well, I have finally decided to try it:
I was always intimidated by it but when I started working on it, I couldn't believe how easy it was to do!
I added my own small details to it, like putting 2 pearls on each charm and adding a crystal charm in each bundle.
This was worth the wait and the time! I love it and I have plans to make more.
I made this necklace this morning. It is so pretty and sparkly! I saw another necklace on display at my Michaels store and I used that one as a template but used a few different beads that I liked better. Here it is on the bead board:
The bead board is very helpful to lay out the beads in your pattern before you string them. It is also helpful because it has measurements on how long your necklace will be. I made mine to be 12 inches for the first strand and 10 inches for the second strand.
Each strand has 4 different types of beads. I like to have a mix of natural, gemstone and metallic. It gives a nice flow to the design and adds sparkle! I am also loving the toggle claps lately! I have been struggling with the lobster clasps and and am not that confident in magnetic clasps yet.
My daughter's nickname is Snowflake, given to her by her Uncle because the day she was born it snowed (it rarely snows here!).
My friend Maria created an art piece she called Snowflake. She hand painted a beautiful fairy and reproduced it into greeting cards. I turned that greeting card into a wall hanging charger plate.
I glued the rhinestones, added scrapbook paper in the center and added pipe cleaners around the center circle. This was a quick and easy gift for my daughter.
You can join Maria's fan page by CLICKING HERE! You can also go see all of her other art, which is stunning by CLICKING HERE!
I did not have anything metal so I used aluminium foil and ran it through my Cuttle Bug. I also used the ink to color the ribbon and the rhinestones. I am so excited I can color them now! Anyone who knows me, knows I LOVE THE BLING!! I have a 3lb bag of rhinestones in my drawer just waiting to be used, lol!
I also received my Cricut Swap back today, so I used 2 pieces from the "Things that fly" group. I am sorry, but I don't know who made them because the names where not on the back.
I wrapped the ribbon onto the inside of the card so I would not have to cut the ribbon, so I hide the seam with a cut out stamp and another cut from my Cricut Swap group.
Thanks for the challenge Studio L3! I learned alot!