I hope everyone has had a joyful holiay season! Mine has been busy, busy and busy! I have a lot to catch up, again, but I wanted to share this:
http://scrappedlives.nl/pop-up-heart-card-5296.html
The design team for Scrapped Lives worked ona Valentine's Day card and mine was posted!! I am excited about this, it was fun to do and all of them turned out fabulous!! If you have SCAL, you can purchase the file here: http://scrappedlives.info/index.php?main_page=product_info&products_id=340 and it is only $1.45, now on sale!! Awesome deal!!
Friday, December 31, 2010
Sunday, November 7, 2010
Sure Cuts A Lot - SCAL
I am excited to say that I am now an affiliate for Crafter's Edge and the Sure Cuts A Lot program for the Cricut! I purchased this program over a year ago and I have used it so much! Some people say that you will not need to purchase another Cricut Cartridage, but I still do because I like to have more options.
The Sure Cuts A Lot (SCAL) program is a versitale program that will let you cut any font in your inventory... if you are like me, I have over 1000 fonts I have collected over the years! There are so many websites out there that offer free files to download to use in SCAL. I have made many projects, including the most recent turkey post, using SCAL. My turkey took me 45 minutes to cut, color and glue together. It took longer to wait for the glue to dry than it did for me to cut the pieces, lol!
If you own a Cricut machine, even the Cricut Cake machine, you NEED SCAL!! Let me know if you have questions and please follow my links so you can help me earn a little play money for my crafting hobbies! =o)
Sure Cuts A Lot information: CLICK HERE
Sure Cuts A Lot purchase: CLICK HERE
Also, once you purcase the program, let me know and I will direct you to some awesome websites you can start downloading from! I will add them to my blog soon as well! Happy Scrapping!!
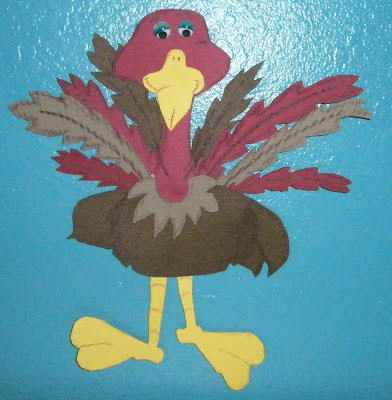
Gobble! Gobble!
Here is my turkey I made today. I downloaded the .cut file from this website, CLICK HERE. I made it bigger than the original file, so he can sit on the fireplace mantel next to the haystack of Adam & Sarah. He is about 10 inches high and 9 inches wide. I used Sarah's crayons to highlight all the pieces and I found some cute googly eyes to make him adorable! I am glad I made him... now I need to figure out how to stand him up =o)
Friday, October 29, 2010
T-shirts
Sarah and I painted t-shirts this week. I made a Halloween shirt and Sarah made a glow in the dark turtle shirt. We cut the images out with the Cricut and then traced them onto the shirt with the paint. We then filled the images with more paint, but we used too much and the shirts took a few days to dry. We learned how to use paint this week, lol! It was fun!
Halloween Costumes
Adam & Sarah in their costumes for school. Sarah is Picacho and Adam is, well, Adam. =o) We made Sarahs from 95% Michaels product. (The yellow pants were not from Michaels.) The ears are paper and black paint with yellow ribbon. The tail is yellow foam with brown fabric paint. The shirt has brown fabric paint.
Adam's is not finished yet. He is going to be yuckie and scary. Pictures to come soon.... =o)
Peace Sign
This is a fun peace sign necklace I made from my cricut. I found the peace sign image from a Yahoo search and created an svg with SCAL. I then cut it out on pretty scrapbook paper and another on the back, chipboard of a paper pad I purchased. I then MOD Podged them together and done. It turned out so sturdy and pretty.... it was way too easy!!
Saturday, October 16, 2010
Candy Melt Fun
I had a little bit of time after I got home from work to spend with the kids. I saw some candy melt halloween molds at work today and decided to give it a try. I am not a chef or baker or anything else that involves cooking but this looked simple enough and besides, I have 2 kids to help me! We melted the candy and it was neat because the bags did not get hot at all, so the kids could hold the bags. We snipped off the ends and away they went... Sarah filling the monster finger mold and Adam filling the skull mold. Since this was our first time doing this, we just experimented with it. The kids had extra candy in their bags, so I let them put it on a plate. Sarah made a chocolate happy face and Adam made drops of green. They are refridgerating now, but we snuck a taste and they are so good! This could be a dangerous new hobby!
Blog Template
I am changing my template around and seeing what I like. This is fun!
Friday, October 15, 2010
"My Kids" centerpiece
I started this yesterday and finished today. It was pretty simple, it just took a little bit of TLC time! I purchased the hay bale, the ribbon and the scarecrows at Michaels, on sale. The names of the scarecrows (my kids) I created with my cricut and SCAL using the font Arizona. I asked my son to go outside and find me sticks to use as dowels to hold the names and it looked awesome! It really adding a little something special, since these sticks are from the tree my husband planted when he was 13 years old. I created the pumpkins from my cricut using the Mini Monsters cartridge. I inked the edges of the shapes and then added glitter glue to the leaves to give it a little bit of sparkle. I used my daughters black pastel to create little lines in the pumpkins to give them a bit of detail. Overall, this project cost me under $20 and it was fun to make!
Design Team
I am very excited to announce that I am part of the Design Team at http://scrappedlives.nl/ , this is my first design team I have been one and I am so happy it is for Carla! I love her website, I have been following it for over a year.
Every month, 6 of us will receive a file from Carla and we need to use it in some way. I saw a sneak peak at the first file and I can't wait, I already know what I am going to do! =o) This is very exciting and I can't wait to get started!!
Sunday, October 10, 2010
My Mummy has candy for you!
I made this pumpkin at the Michaels Great Pumpkin Event yesterday. Sarah made the adorable black spider. The mummy is 3 stacked pumpkins, held together with a dowel stick and duck tape. Then I wrapped 5 yeards of muslin around her, topped her off with 3 yards of gauze and some googly eyes and 1 pipe cleaner smile. The sign I made with my Cricut, a cut up box, a dowel stick, a piece of wood from my backyard, silver embossing powder and lots and lots of Mod Podge (you can see the Mod Podge in one of these photos, I used too much at one time and it is taking forever to dry, lol!) The black spider is a painted craft pumpkin with pipe cleaner legs, googly eyes and a pom-pom nose. Sarah didn't want a mouth because it is a cute spider who doesn't bite.
We had so much fun!
Saturday, October 9, 2010
My Crafting Room
A few months ago, my kids helped me to "clean" up my room. They helped me pick out the colors & paint the room. The Jetmax desks helped make the room look clean and it is staying clean. My kids have a desk each and I have a desk. It is working out perfectly!
Bath Time pop-up page
I made this page using directions from the Everyday Cricut Blog, http://www.cricutholiday.com/ . It was so easy and it turned out awesome! I had more of a challenge with figuring out what I wanted the page to look like more than actually getting it cut. I have plans to do more!
A pumpkin 2 years in the making...
I was opening up Halloween bins that we stored from last year and found this pumpkin that was not finished from last year, that I completely forgot about, lol! Last year, I was able to get it cut and painted but that was it. The funny thing, it took me an entire 5 minutes to finish it up, lol! I used photo squares to stick the web into the inside of the pumpkin and then just placed the spiders inside the web, the web holds up the spiders just right. This was fun to make and it is funnier that it took me 2 years to do it!
Tuesday, October 5, 2010
Baby Gift
I made these as a baby gift for one of Sarah's teachers, a bib and a wash cloth. I am loving 100% cotton yarn!
Crochet Bear
Here is a little bear I crochet for my husbands Grandmother. She didn't like to fly so I made this for her to hold while she was in the airplane. It turned out so cute!!
Paper Scrapbooking - Older Photos
I made this pages using some of my photos from my "archived" collection, lol! 2 pages are from when I was a kid with my grandparents and the other page is of my parents wedding day. =o)
Subscribe to:
Posts (Atom)